Creating a Class on Sphero CentralUpdated a year ago
Creating a Class on Sphero Central
Once you've created your Teacher account (instructions here) you can start creating classes. Check out the video above or the steps below for help getting started.
- Once signed in to Sphero Central, click the My Classes tab under the BOLT+/RVR+/Mini section
- Click the Create New Class button on the left side of the screen
- In the resulting window, select the type of class you want to make (we recommend a Class Code Class)
- Now that you have the class, its time to add students
- To add students individually, click Add Students on the and then fill in the students first name and last initial.
- You can also have the students add themselves after they use your Class Code to login to the Sphero Edu app.
- If you instead want to add all your students at once from a CSV file, click Add Students with CSV
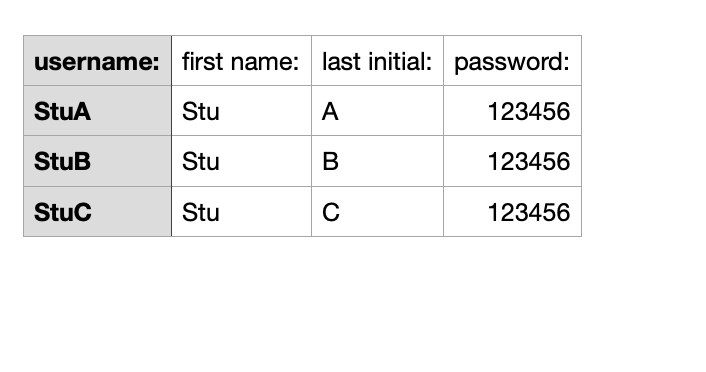
- You’ll see a window that includes a button to download the CSV Template and a button to select the completed file
- Once you’ve filled in the required information like in the below example, and chosen the finished CSV on the site, Sphero Edu will pull in the information from every cell and you can preview before pressing Submit
You can also manage classes with our Clever and Google Classroom integrations.